Assignment and Part Three Feedback Reflection

I received feedback from my tutor. As always, I found feedback helpful in understanding what I am doing right as well as challenging me to consider doing some things differently.

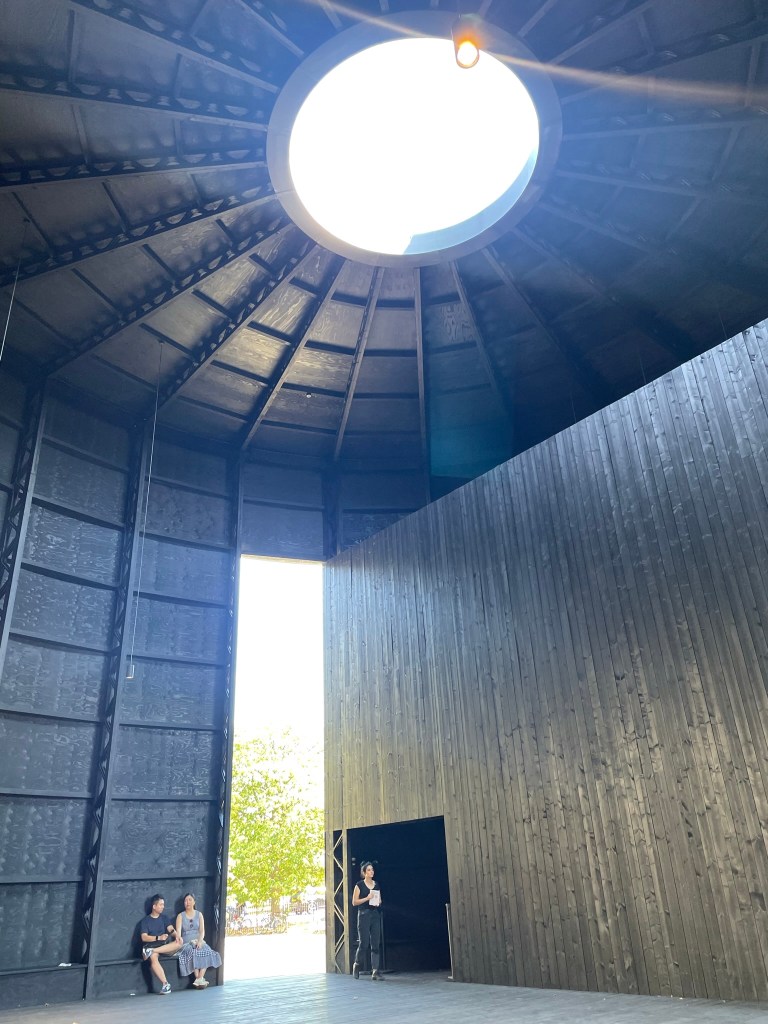
Hallway and lodgers room survey and drawings: It was good choice to draw in people to demonstrate the scale as well as using different colours for measurements – this aids understanding of the drawing. Next time – if drawing only plan, I should note the ceiling height on the plan. It is handy to draw elevations as well as plan drawings, as elevations show many aspects that plans don’t, such as ceiling, door, skirting board heights. Perhaps also light fittings, pendants etc, how low they drop could indicate and conflict (I’ve seen some homes where doors interfered with pendant lampshades)

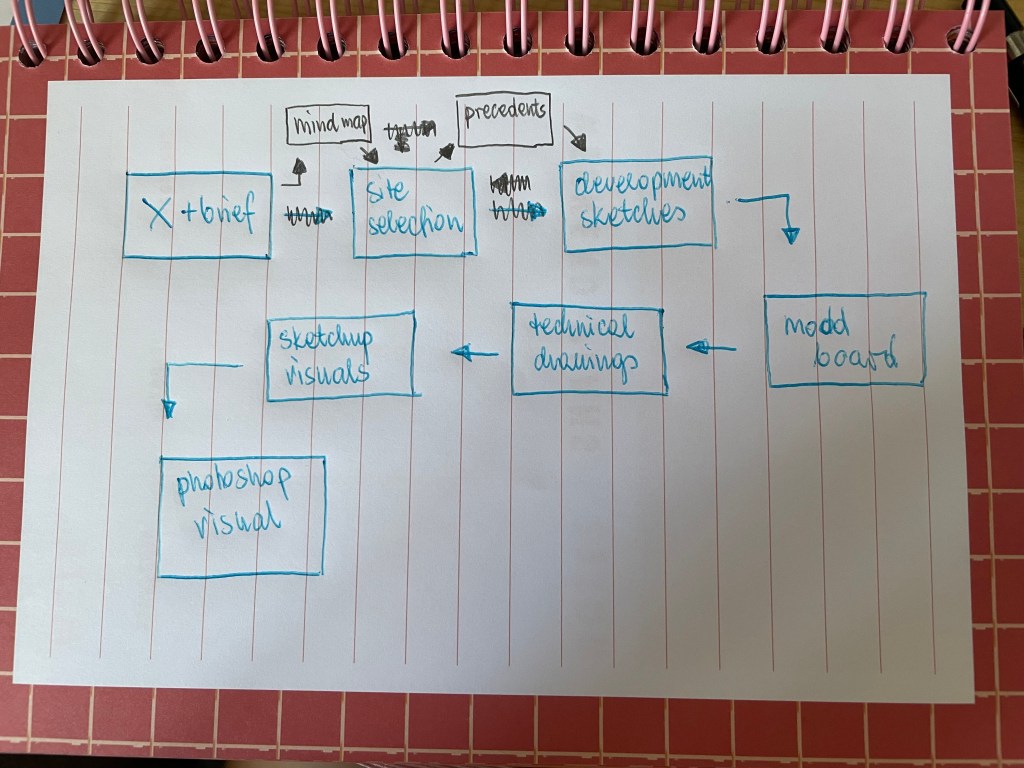
My tutor noted that it ‘would be more helpful to see move development work’. I must admit this is the hard bit. Often there isn’t a lot to show. Mainly because I come up with an idea in my head and just do it. So, what I put on the learning log, is all there is to show. I suppose it makes tutors work harder, trying to understand my process, that’s mainly in my head. My tutor recommends making more sketch models, which I find the hardest to do.

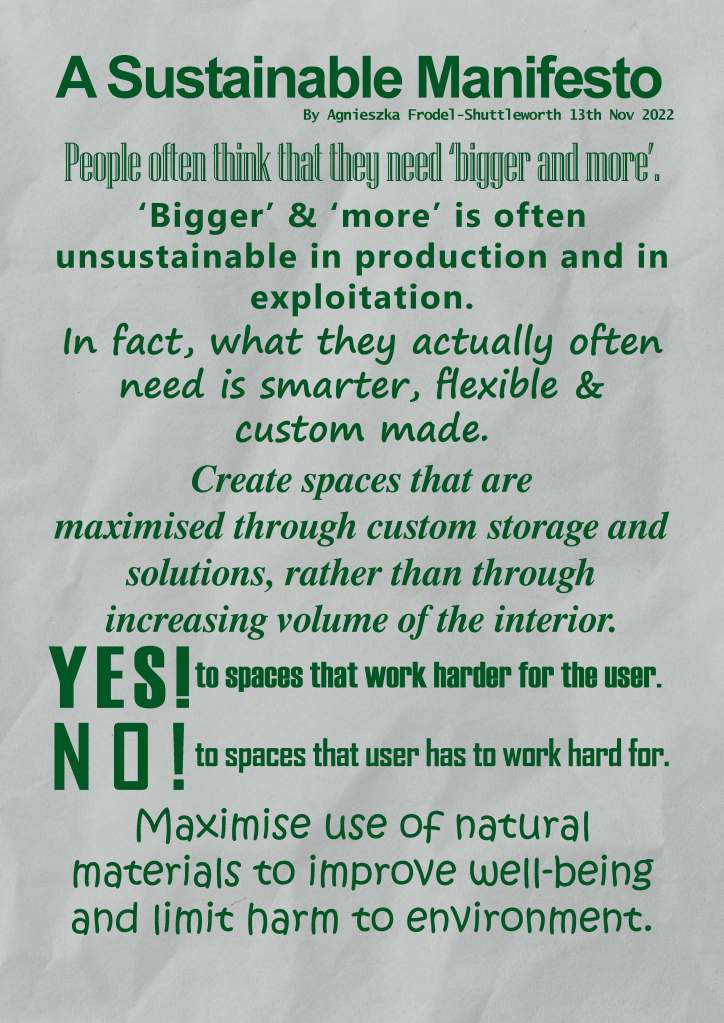
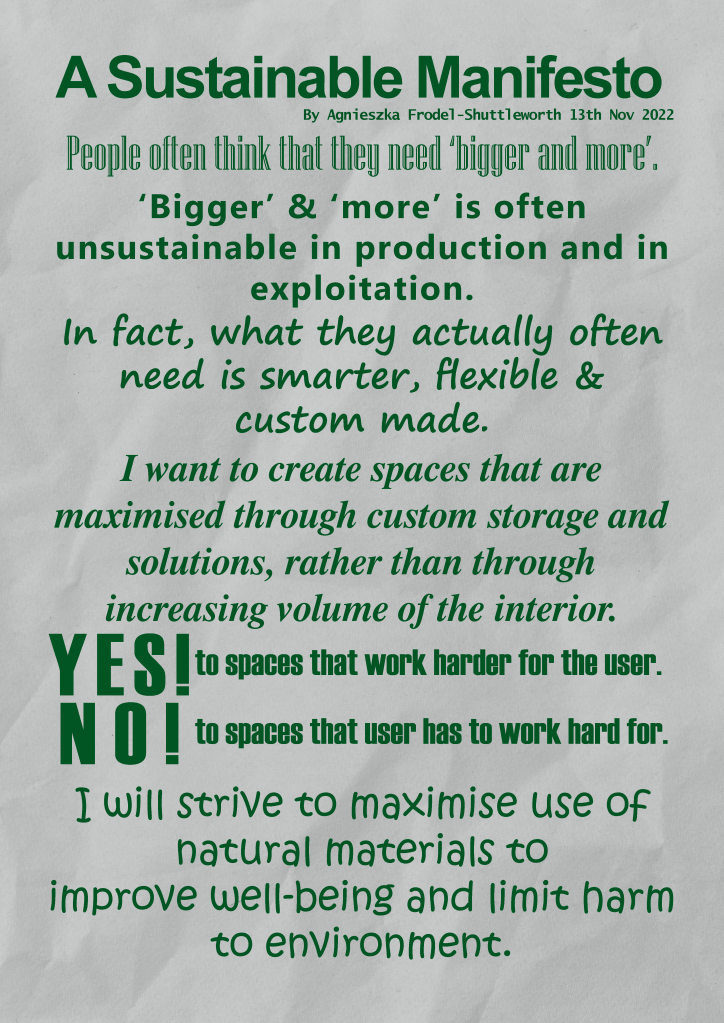
For my manifesto my tutor suggested some challenging ideas, such as remove the ‘I’s (want, will etc) and also make ‘yes’ and ‘no’ statements in different fonts to make them contrast with each other. I tried it and I like my manifesto more now. The statements are stronger now, the manifesto looks punchier. As I reflect and look back now, I realise that one of the design inspirations for my manifesto was a poster with message in different fonts. I can’t remember by whom or where I saw it… My tutor also challenged me to think about how / where my manifesto could be presented – I think this particular one would look good in print – poster or a t-shirt but could also be placed on a website. I don’t think Billboard would be good – they use a lot of material to display the message (therefore not sustainable, contradicting my manifesto), also the layout of a page would have to be changed (which of course is possible, just needs changing).

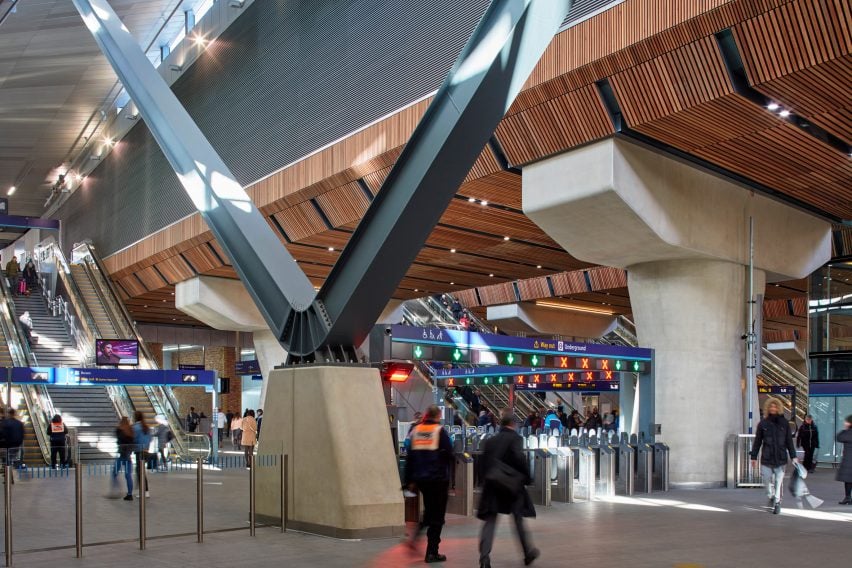
My tutor recommended that in future research task / study presentations I should research, analyse, and include images of technical drawings for the researched projects. This will allow me to discover more in depth what made the design work, as well as enhance the already in-depth research. I can see how it would have helped me if I looked up Barbican original plan drawings or Holmes Road Studios Design Development Documents.

 My Es Devlin’s manifesto research had a good level of personal response (as opposed to Roberto Venturis analysis). I should try and include my personal responses all the time. I could have dived deeper in the analysis of manifesto’s and compared the ones I analysed with each other. Doing so would have helped me form opinions and improve my critical thinking and analysis skills.

Including more of my own drawings is also suggested by my tutor. I should show more development work, perhaps redevelop ideas I already put to paper, tweak them a bit (as I did in this reflection with my manifesto), test and retest the ideas. This will help me refine the ideas as well as give my tutor an insight into my processes.

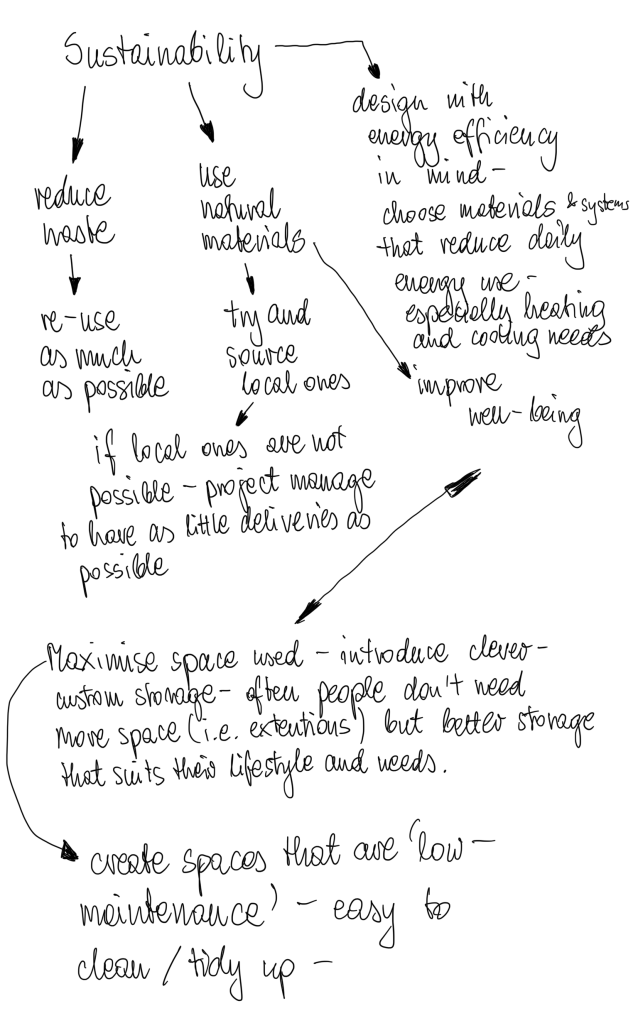
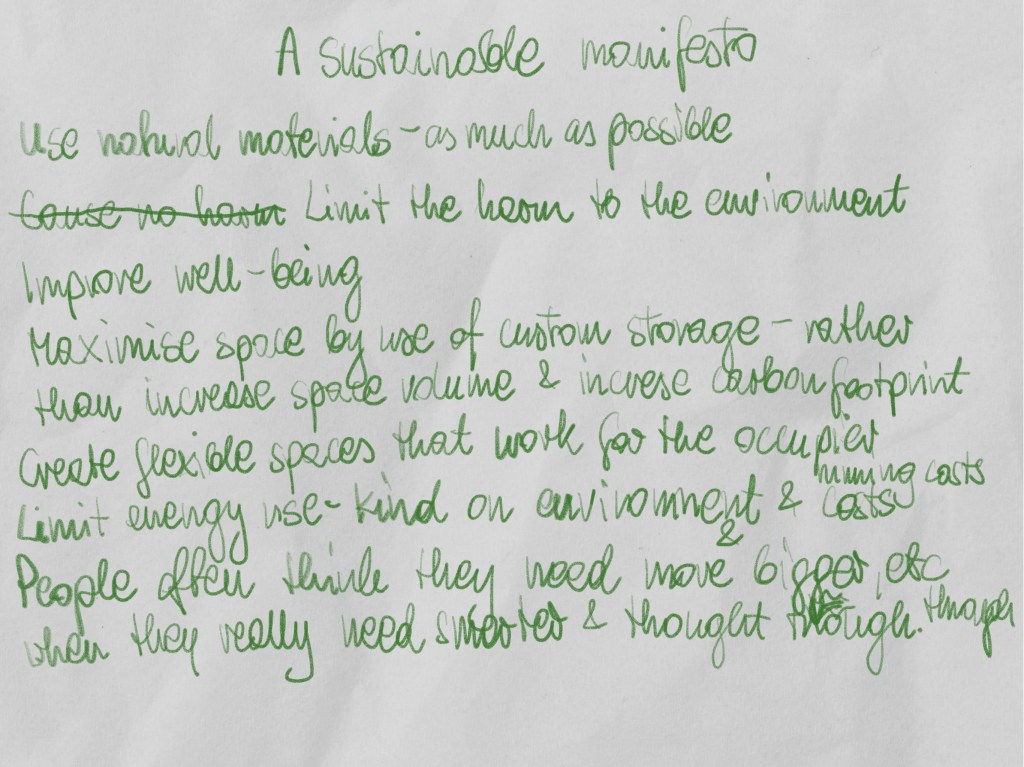
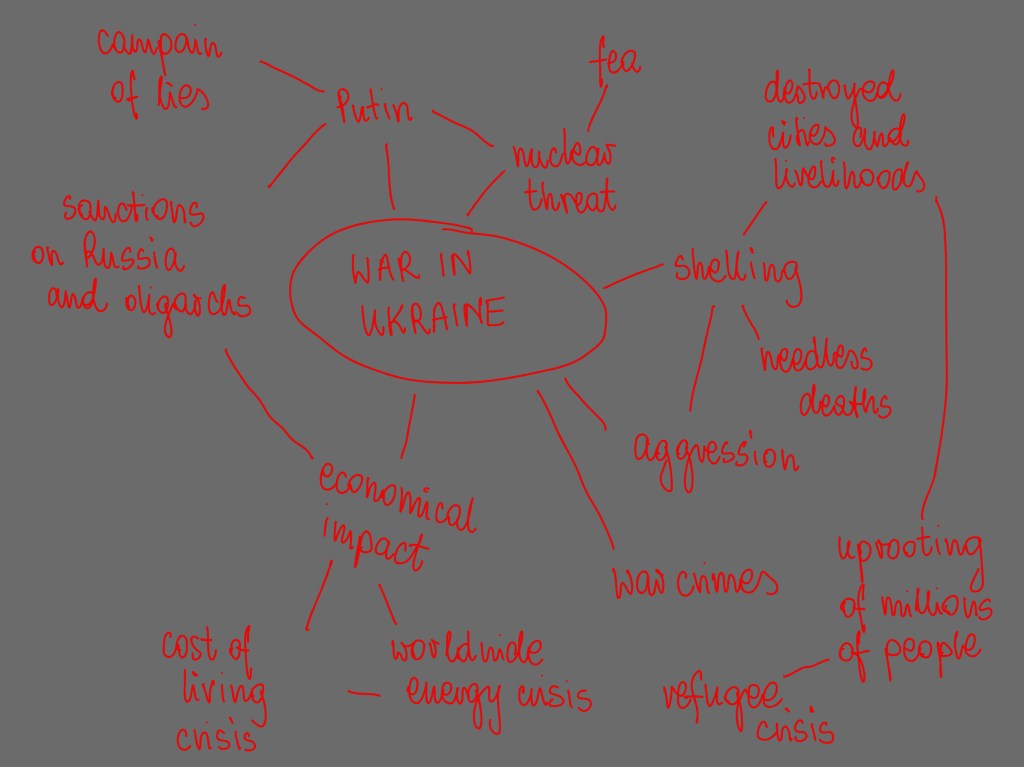
Looking back, I should have researched the idea of sustainability before creating my mind map, to enrich it.

It will be beneficial to me if I include such ‘looking back’ in my future reflections – think of what I could have done better or just differently and how this could have benefitted my progress or even research results.

Assignment Three: Your Design Manifesto for a Living Space

Drawing on the methods and processes learnt throughout Parts 1, 2 and 3, make

or write your own Spatial Design Manifesto to be used throughout the rest of this

unit.

Develop your manifesto to celebrate and visually present your position on an

issue related to spatial or interior design. Present it to reflect your position. For

example, you may want to explore the enjoyment of playful spatial design, the

importance of functionality through the material choices you make or

demonstrate your position by presenting examples of design you think are

unsuitable, ugly or dull.

Use your manifesto to say what key elements of interior design you find good,

interesting, bad or beautiful – and why. You may want to use quotes from other

artists or designers as part of your manifesto.

Reflect on your own experience as an occupant-of-interior-space. What kinds of

spaces do you enjoy and how do other spatial designers help to support this?

Celebrate these examples of good practice or innovative approaches by

proclaiming what makes for a better spatially designed world!

Use the most appropriate means or medium to do this (written, modelled,

2D/3D, digital, technical or hand drawn) to ensure that your manifesto ideas are

communicated in a coherent, clear and concise manner.

Reflection on the assignment / how did I get there:

First, I thought long and hard about what is important to me and why. My main interest is in the interiors that have custom designed features, to suit the user needs. Sustainability is equally important to me. I believe that often we don’t need more space – we just need to use what we have wisely. I jotted some notes and then thought about how I can present my ideas. I purposely made my manifesto very concise. I want to get my message across, but I wanted to keep it short and sweet. Our lives are fast paced, and I wanted my manifesto fit in it. To underline the sustainability issue, I created a background of a crumpled piece of paper – one that you might discard otherwise – yet still perfectly usable. I made the text green as that colour is often associated with nature and well-being. I used different fonts for different points to add to the interest. I uploaded the manifesto into the padlet.

Finding the issue for my manifesto was relatively easy, yet it took longer than the hard part of deciding on the look of it.

I wanted my manifesto to look like poster, I think I achieved that goal.

Reflection on the unit as a whole:

I enjoyed most work in this unit. I found all exercises interesting and most importantly informative.

I found it interesting to read about philosophical approach to the idea of a home in research task one, now I am thinking I should actually read the entire books I briefly studied in 1st research task.

Case study: small space of living was just wonderful. I found it really interesting reading about the architect (Peter Barber), the project Holmes Road Studios and the architecture aiding the therapy. Creating the research presentation document also helped me brush up on the InDesign skills once more.

‘Your living space’ and ‘AN Others space’ exercises helped me brush up and improve my site surveying skills. I also chose to draw by hand for this exercise, despite my preferred method being digital – just to practice on paper.

Research into Barbican helped me to practice sifting through vast amounts of material available and selecting the important bits to present. It’s so easy to get lost in the research!

193 Grove Road research – I feel just grateful to learn it. Fascinating story but it was quite hard to find extensive information on what Sydney Gale might have been feeling. Just had to imagine I was in his position. Despite his bruised ego, it’s a shame the artwork was destroyed…

I found researching and analysing manifestos quite hard. Mainly because personally, I find most of them pompous and quite frankly many of them are long and boring… It was helpful to be given specific tasks in regard to the manifesto text –it helped me fleece out the relevant information out of it. I was pleased I chose Roberto Venturis ‘Non-straight forward manifesto’. Such a joy to find that signature with a shape of a house he designed in the past. It was also useful to just analyse his manifesto in bullet points.

It was a bit harder to draw it. Took me a while to come up with a concept but once it popped in my head, I knew what to do and had it ready in a matter of minutes.

Finding the right contemporary manifesto to analyse took a little bit of searching. Luckily, I came across Dezeen 15 Festival where 15 artists / designers wrote special manifestos for the occasion. I chose ‘Swap card for trees’ by Es Devlin’s the easiest to read and understand. Manifestos should be able to reach the reader rather than just exist for the benefit of its creator. It was also just nice to dream about what the future could look like. This text really spoke to me, I keep thinking about it – hope it comes true soon!

Jimmy Caunty and his ‘Riot in a jam jar’ was quite a hard story to research. There is a lot of information about him but not a lot about the exhibition. I even watched some music videos from his music career, and oh boy – some of them are something else. (The KLF – What Time Is Love? (Live at Trancentral) (Official Video) – YouTube )

Mind maps were invaluable in helping me to create my own manifesto.

Great part, enjoyed the work in part three very much!

Assignment 2 feedback reflection

I received Assignment 2 feedback from my tutor. It was a positive and encouraging one. Especially good to hear that generally I am progressing well through the coursework.

My tutor would like to see more sketch models, we had a chat afterwards and she suggested using card and stick it together with pins is a good way of quick sketch models to demonstrate the process.

My tutor noticed an error in my technical drawing, where I didn’t include a thickness of the mdf if the section drawing. I must admit I find sections particularly challenging, especially of things that do not exists (yet). Despite that my technical drawings look professional, and use of CAD is good and helpful in completing tasks. I was pleased to hear that in the feedback.

The design choices of my folly could have been better, and I should consider re-using and thus limiting environmental impact of the structure. During the design process I should consider future renovation/ conservation of the design.

My tutor gave a tip to overlay the materials on the material board, so it is clearly visible how they’ll go together, specifications could be on a separate sheet.

My tutor was impressed by the scale of my Serpentine Pavilion research. She suggested I visit this year’s one – Black Chapel Pavilion. I went to see it last weekend. It felt serene and quiet. Reminded me of silos. Despite being all black structure sitting in the sun – it was cool and pleasant inside. Theaster Gates must have carefully thought of airflow throughout the interior.

Black Chapel Pavilion by Theaster Gates (2022) – photograph by A. Frodel-Shuttleworth (2022)

My tutor gave me a tip to look at technical drawings when completing precedent studies as this will challenge me to understand the design better.

I should add images when reflecting on designs – so the reader could understand better what I am describing.

My tutor suggested searching OCA library for some books about symbolism in architecture – referring to scaled up objects – kitsch American designs that I skipped in one of my exercises.

Generally the work was well done, but as usual there is room for improvement. I am grateful for all the tips and suggestions.

Assignment Two: Designing Your Folly

Here is my design presentation document, created in inDesign, saved as a high quality PDF

Reflection on the assignment 2 and part 2.

I absolutely loved the activity of designing and presenting my folly. The whole process was easy to follow, and the elements became the bricks in my storyboarding plan.

Finding the issue and creating a mind map was a very quick activity for me. At first, I created a mind map on war in Ukraine, then I realised I was supposed to concentrate on one word, so I did another one that I used in my presentation document.

Here is the mind map I did not use:

War in Ukraine mind map I haven’t used in design document.

I decided to challenge the notion of boundary as it is somehow connected to the issue of war (where borders are challenged). I challenged it by placing two walls and criss-crossing them, then piercing opening through them.

I enjoyed the design development stage, I considered how can I create something fun with such serious connection. I chose the cross plan with red roof as a protest to the bloody violence going on in the Ukraine. At the same time the public can interact with the folly with a fun way, I can imagine children climbing though the openings while the families wait for their trains, and general public just using it as a rest place in the busy station concourse.

I built the Lego model first, to see how it would look.

Technical drawing was challenging but enjoyable, as usual. I consulted the in-house carpenter on choice of materials. On his advice I chose the frame structure elements to be:

  1. Base, under the entire structure – osb board 18mm thick Wickes General Purpose Oriented Standard Board 3 (OSB 3) – 18 x 1220 x 2440mm | Wickes.co.uk
  2. The middle unit connecting the cross’s arms built using 100 x 100mm fence posts Incised Timber Fence Post 100 x 100mm x 2.4m | Wickes.co.uk
  3. Timber for remainder of the frame Structural Graded C24 Treated Timbers 3000mm x 100mm x 47mm (buildingmaterials.co.uk)
  4. I was advised that tongue and grove on the exterior will ‘hold’ the folly together and at right angles. I chose tongue and groves 94mm wide. Wickes PTGV1S Cladding – 19mm x 94mm x 2.4m Pack of 4 | Wickes.co.uk

I struggled and struggled around how the frame components inside my folly will go together, I tried hard and spent a long time working this out. I ended up creating a simple SketchUp model of my folly and sliced it with a section plane to help me understand what will and what won’t be sliced by section line. This was my first time using SketchUp and I found the software easy to navigate. I realise that my CAD drawings are far from perfect and there are probably some errors, but on the other hand they communicate the design well.

This time round I created a template for title block – specifically for study projects. I also overcame difficulties with plotting in CAD – for some reason all new cad files I create have a tiny paper space, so small that a dashed line appears solid in the viewport. I resolved it and now with my template it will be an easy fix in all future drawings.

My photoshop skills are not up to scratch yet. I’m not quite happy with the final result, I need to learn better how to do realistically looking shading and render. I used Euston station image and human figures found online to bring the design to life. Here is where I found them:

Photographer in the visual https://www.pikpng.com/pngl/m/357-3572528_photographer-cameraman-tumblr-camera-man-png-people-cut.png

Man standing next to folly, posing in the visual https://pngimg.com/uploads/man/man_PNG6520.png

Teenager with a smartphone in visual https://www.mrcutout.com/images/cutouts/teenager-with-a-smartphone-sitting-0001-watermarked.jpg

Couple taking a selfie in visual https://escalalatina.com/wp-content/uploads/2022/01/Selfie-Cen-Qro.png

Background image for visual https://cdn.ca.emap.com/wp-content/uploads/sites/9/2020/12/Euston-concourse-December-2020-scaled-e1608297992636-1024×684.jpg

The recent storyboarding tutorial I took part in helped me understand design presentation process.

I created the storyboarding template, but as seen in the image it changed as I worked. Nevertheless, having this little plan to hand helped me a lot with creating the presentation document.

Presentation story board

I wasn’t sure I if you can skip some annotations in presentation document. I didn’t add annotation to this image on my materials page, I thought adding writing there would ruin the look of the page.

Fig. 8 Tongue and groove cladding

I enjoyed Part 2, even though some exercises took longer than expected. I refer to the research of Serpentine Pavilion project, to which references, and list of illustrations were 7 pages long! I enjoyed getting creative with it though.

Part 2 included learning about use, boundaries, and parameters of the space. It included fun and creative activities. There were also invaluable research tasks enriching my knowledge. I am happy I found Felipe De Castro who draws fun building designs based on everyday objects.

I am looking forward to starting next part!

Presentation document list of illustrations

Fig. 1 Adams, P. (2012) Kings Cross Station Western Concourse. [Photograph] At: https://images.adsttc.com/media/images/5006/0367/28ba/0d07/7900/2964/slideshow/stringio.jpg?1414098073 (Accessed 22/05/2022)

Fig. 2 Raftery, P. (2018) London Bridge Station. [Photograph] At: https://static.dezeen.com/uploads/2018/08/london-bridge-station-grimshaw-refurbishment-architecture-_dezeen_2364_col_3-852×568.jpg (Accessed 22/05/2022)

Fig. 3 Brown, E. (2016) London Euston Station – Concourse. [Photograph] At: https://live.staticflickr.com/5473/31245369411_c7ee94d24e_5k.jpg (Accessed 22/05/2022)

Fig. 4 Spasm Design (2022) Site Plan. [Drawing] At: http://cdn.home-designing.com/wp-content/uploads/2018/09/Home-plan-4.jpg  (Accessed 22/05/2022)

Fig. 5 Spasm Design (2022) Slatted ceiling. [Photograph] http://cdn.home-designing.com/wp-content/uploads/2018/09/Slatted-ceiling.jpg (Accessed 22/05/2022)

Fig. 6 STMPJ (2015) Invisible barn. [Photograph] At: https://static.dezeen.com/uploads/2015/07/Invisible-Barn_STPMJ_dezeen_468_3.jpg (Accessed 22/05/2022)

Fig. 7 STMPJ (2015) Invisible Barn. [Photograph] At:  https://static.dezeen.com/uploads/2015/07/Invisible-Barn_STPMJ_dezeen_468_7.jpg (Accessed 22/05/2022)

Fig. 8 Buy Sheds Direct (2022) Tongue and groove cladding [Photograph] At: https://www.silvatimber.co.uk/media/catalog/product/cache/f1b8ab0e44689953590acc819b8ae2b4/s/l/sltgv121sf-3-no-bar_1.jpg (Accessed 22/05/2022)

All other images (unless separately annotated) created by A. Frodel-Shuttleworth (2022) In possession of the author: Epsom.

References

Frearson, A. (2015) Invisible Barn is a mirror-clad folly camouflaged among the trees of a California forest. At:  Invisible Barn is a mirror-clad cabin camouflaged among trees (dezeen.com) Accessed (22/05/2022)

Home Designing (2022) Cross Shaped Modern Home in Peaceful Landscaped Gardens. At: Cross Shaped Modern Home In Peaceful Landscaped Gardens (home-designing.com) (Accessed 22/05/2022)

Assignment 1: The Double Diamond Design Process

Reflection on Assignment 1 and Part 1:

During Part One of Unit 2 the most important things I learnt were:

  1. How to have fun in design process… I was actually quite stressed about this assignment as I was stuck not knowing what to do for ages. And as I was taking a photo of the barbie doll with the cake stand in my kitchen (context for baking) I felt joy. And not only because this was last task or this very difficult assignment, I enjoyed placing it in this conext and seeing how it works.
  2. Talking to other students and tutors/ designers helps to get your creative juices flowing.

Looking back I enjoyed the model making and lego building most. The latter was especially ‘freeing’ as I just built, not knowing what will come out of it. It was just really hard to come up with a function of my model and then creating a story. Something I need to develop – abstract creativity with a goal.

I hope what I did in this assignment is right…

Design a site like this with WordPress.com
Get started